


Fabric Consumption Calculation for Knit and Woven Garments
Noor Ahmed Raaz
Specialized in Apparel Manufacturing
Owner and Editor in Chief Textile Merchandising
Asst. Prof., Department of Textile Engineering
Atish Dipankar University of Science & Technology
Email: textilemerchandising1@gmail.com
Why Consumption Decides Your Profit
Fabric consumption comes up in every merchandiser’s first minutes of shop talk. I have seen an otherwise perfect order turn into a loss because consumption was underestimated by a couple of inches. The buyer paid what we quoted and the factory paid for the rest. Here is why: fabric usually makes up 60 to 70 percent of a garment’s total cost. Get consumption right and your costing holds. Get it wrong and nothing else will save the margin.
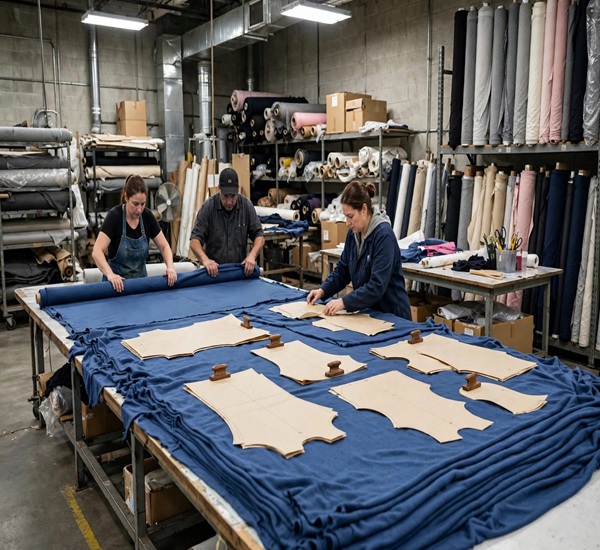
Garment factory cutting room: workers spreading a long lay of blue knit fabric on a cutting table with paper pattern pieces on top
Workers spreading a long lay of blue knit fabric on the cutting table, paper pattern pieces on top — the cutting room is where consumption plans meet reality.
What Does “Fabric Consumption” Mean?
Fabric consumption is the amount of fabric needed to make one garment, or one dozen garments. The unit depends on the fabric type:
- Knit garments — quoted per dozen, in kilograms.
- Woven garments — quoted per piece, in yards or metres.
The reason is how fabrics are traded: knit fabric is bought and sold by weight, woven fabric by length, so merchandisers follow the trade.
The Knit Formula
For knit garments, consumption is calculated in kilograms per dozen:
Consumption (kg/dozen) = (Length + allowance) × (Width + allowance) × GSM × number of parts × 12 ÷ 10,000,000
All measurements are in centimetres; the 12 stands for a dozen, and 10,000,000 converts square centimetres and grams to square metres and kilograms in one step.
One warning: the length and width here are not finished garment measurements. Add about 1.5 to 2 cm for sewing and shrinkage, or your consumption comes out short.
Worked Example 1: Basic T-Shirt (Knit)
A basic T-shirt in 180 GSM single jersey, size M finished measurements first, allowances added:
- Body length: 70 cm + 2 cm allowance = 72 cm
- Half chest: 50 cm + 2 cm allowance = 52 cm
- Sleeve length: 22 cm + 2 cm allowance = 24 cm
- Sleeve width: 42 cm + 2 cm allowance = 44 cm
Then each part goes through the formula:
- Body (front + back): 72 × 52 × 2 × 180 × 12 ÷ 10,000,000 = 62 kg/dozen
- Sleeves: 24 × 44 × 2 × 180 × 12 ÷ 10,000,000 = 46 kg/dozen
- Neck rib: about 03 kg/dozen (small parts are usually estimated)
|
Part |
Length cm |
Width cm |
Parts |
GSM |
Consumption kg/dozen |
|
Body |
72 |
52 |
2 |
180 |
1.62 |
|
Sleeves |
24 |
44 |
2 |
180 |
0.46 |
|
Neck |
— |
— |
— |
— |
0.03 |
|
Subtotal |
— |
— |
— |
— |
2.11 |
|
Wastage |
— |
— |
— |
— |
0.10 |
|
Total |
— |
— |
— |
— |
2.21 |
That makes a subtotal of 2.11 kg/dozen; 5% process wastage brings it to 2.21 — which most merchandisers quote as 2.2 kg per dozen at booking. Keep decimals through the calculation and round only at the end; rounding early lets small errors add up across parts.
How Woven Garments Are Calculated
Woven garments use area and fabric width instead of weight:
Consumption per garment = total pattern area ÷ cuttable fabric width
For each part: (Length × Width × number of parts) ÷ fabric width. Total the part areas and divide by the cuttable width — the usable part between the selvedges, not the full loom width. Work in inches, then convert to yards.
Worked Example 2: Men’s Long-Sleeve Shirt (Woven)
A men’s long-sleeve shirt, 58-inch cuttable fabric width; measurements in inches, allowances included.
|
Part |
Length in |
Width in |
Parts |
Area sq.in |
|
Back |
31 |
25 |
1 |
775 |
|
Front |
31 |
13 |
2 |
806 |
|
Sleeve |
26 |
15 |
2 |
780 |
|
Yoke |
6 |
25 |
1 |
150 |
|
Cuff |
4 |
10 |
2 |
80 |
|
Collar |
3 |
18 |
1 |
54 |
|
|
6 |
6 |
1 |
36 |
|
Total |
— |
— |
— |
2,681 |
- Consumption = 2,681 ÷ 58 = 46.2 inches = 28 yards
- Add 5% wastage: 1.28 × 1.05 = 35 yards per shirt (roughly 1.23 metres)
At booking you would order about 1.35 yards per shirt — and notice every small part is listed separately. Leave one out and the number is wrong.
Worked Example 3: Woven Trouser
Bottoms follow exactly the same method. Take a men’s trouser in the same 58-inch fabric, measurements in inches including allowances.
|
Part |
Length in |
Width in |
Parts |
Area sq.in |
|
Front |
43 |
13 |
2 |
1,118 |
|
Back |
43 |
14 |
2 |
1,204 |
|
Waistband |
3.5 |
40 |
1 |
140 |
|
Fly |
7 |
4 |
1 |
28 |
|
Total |
— |
— |
— |
2,490 |
- Consumption = 2,490 ÷ 58 = 42.9 inches = 19 yards
- Add 5% wastage: 1.19 × 1.05 = 25 yards per trouser (about 1.15 metres)
One detail beginners often miss: pocketing is a separate fabric, so it never goes into the shell consumption. Waistband, fly, and pocket tops do and they are small enough that people forget them. Now you have a pattern to follow for any woven bottom: list every part, total the area, divide by the width.
Wastage Allowances at Booking
No process is perfect end losses on every roll, cutting waste, sewing rejections, knitting and dyeing losses. So merchandisers add wastage on top of the calculated number. The typical ranges:
|
Stage |
Typical |
|
Cutting |
2–3% |
|
Sewing |
1–2% |
|
Knitting/dyeing |
3–5% |
|
Total |
5–8% |
|
Total |
3–5% |
These are practice ranges, not rules. If your factory has its own standards from production data, use those they beat any textbook number. For a new factory or a difficult fabric, start at the higher end.
Why the CAD Marker Beats the Formula
The formulas are excellent for costing and sampling, but they are estimates. The most accurate consumption comes from the CAD marker all pattern pieces nested on the fabric width in CAD software before bulk cutting.
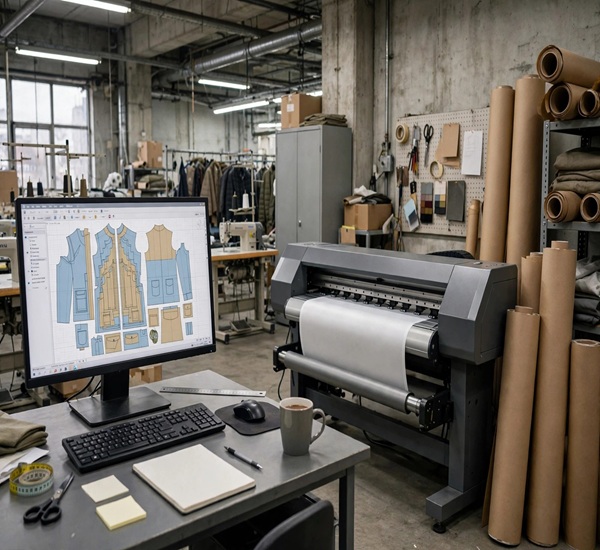
CAD marker-making workstation: computer screen showing nested garment pattern pieces in a garment factory office, plotter beside it
A CAD marker workstation: nested pattern pieces on screen and the plotter that prints the full-size marker for the cutting room.
Marker efficiency is the percentage of the marker area covered by pattern pieces typically 80 to 85 percent. The formula assumes a neat rectangle per part, but the marker shows how pieces actually interlock: collars and cuffs fit into gaps left by larger pieces, which no formula can show.
The standard workflow: use the formula at costing and sampling, when there is no marker yet, then take consumption from the production marker before booking bulk fabric. The marker number almost always differs slightly and it is the one you trust.
A little more on how the marker actually comes together, since buyers will ask you about it. The CAD operator lays all the pattern pieces for every size in the ratio say S:M:L at 1:2:1 inside the cuttable fabric width, keeping the grain line straight. Marker length is simply how long the nesting runs, and marker efficiency is the covered percentage of that rectangle. For solid fabrics a good operator reaches 80 to 85 percent; anything below 80 means money is lying on the cutting table.
Why do buyers demand the CAD consumption before order confirmation? Because their costing sheet and your quotation have to agree, and a marker made from approved patterns is the first truly honest number. It is also why checks and stripes cost more fabric than solids: matching a check at the seams or keeping a stripe symmetrical across the front means the operator cannot rotate pieces freely. Efficiency on a 5 cm check can drop to the low 70s, and the buyer pays for every lost point. When I quote a checked style, I never use solid-fabric consumption — I ask the CAD room for a quick matching marker first, even at sampling stage.
Factors That Change Consumption
Consumption is not a fixed property of a style it moves when the conditions move. Watch these:
- Fabric width. A narrower roll means a longer marker for the same garment. Shifting from 58-inch to 44-inch fabric can push a shirt’s consumption up by 15 percent or more always recalculate, never just scale.
- The allowance you add at costing must cover the real shrinkage of that fabric after washing. Check the lab dip report, not your memory.
- GSM variation in knit. Fabric that comes in at 190 GSM instead of the planned 180 uses more weight per garment. At booking for a big order, a small GSM drift can mean tonnes of extra fabric.
- Size ratio of the order. The average consumption for a size set of S-XL differs from a run of mostly XL. Your formula uses one size; the marker consumption is weighted by the ratio.
- Style features. Extra panels, pleats, yokes, double collars, linings each adds area and none of it is free. A pleated skirt can need 30 to 40 percent more fabric than a straight one of the same length.
- Check and stripe matching. As noted above, pattern matching can knock several points off marker efficiency.
- Fabric defects. A roll with recurring faults means usable width drops below the quoted cuttable width and the cutter leaves more unusable end pieces.
The Three Stages of Consumption
A merchandiser calculates consumption three separate times, and each time the tool changes:
- Costing stage. No patterns exist yet. You estimate with the formula from a spec sheet this number goes into your quotation, so it must be safe, not optimistic.
- Booking stage. Patterns are approved. The CAD room makes a mini-marker or a full marker, and you book fabric from that number plus wastage. This is the quantity that goes on the purchase order.
- Production stage. The final production marker, made in the actual size ratio and cuttable width, sets the cutting consumption. Compare it with the booking number if it runs higher, you order the balance before cutting exhausts the stock.
One habit worth building: re-check consumption after PP (pre-production) sample approval. Measurements almost always shift between the development sample and the approved PP a sleeve gets longer, a waistband wider and a costing-stage number quietly goes stale. The merchandisers who never run short are the ones who recalculate at this point instead of trusting the first figure.
Common Mistakes Junior Merchandisers Make
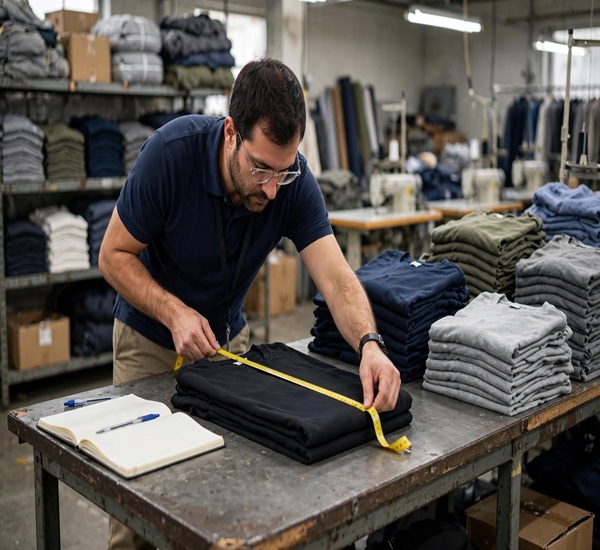
A merchandiser at a factory table measuring a folded T-shirt with a measuring tape, notebook beside him
A merchandiser checking a T-shirt’s measurements at the factory table careful measuring habits are the foundation of accurate consumption.
Most consumption errors come from the same short list:
- Using finished measurements without allowances. The most common trainee error: the formula needs measurements plus sewing and shrinkage allowance.
- Using full chest instead of half chest. The body is calculated per panel, front and back separately full chest width silently doubles body consumption.
- Ignoring shrinkage. A cotton single jersey can shrink 5 percent or more in washing your allowance must cover it.
- Forgetting small parts. Neck rib, collars, cuffs, pockets look tiny, but they add up. List every part before calculating.
- Not adding wastage. The formula is theoretical. Real factories have cutting waste, end losses, and rejections booking without wastage is how a factory runs out of fabric mid-order, and rebooking is always expensive.
FAQ
Why is knit consumption in kg but woven in yards?
Because that is how the fabrics are traded: knit fabric is produced and sold by weight, woven fabric in a fixed width by length. Merchandisers follow the trade.
What is marker efficiency?
The percentage of the marker area covered by garment pattern pieces. At 85 percent efficiency, 85 percent of the fabric becomes garment parts. Higher efficiency means lower consumption which is why a skilled CAD operator earns their salary.
How much wastage should I add?
For booking: 5 to 8 percent on knit, 3 to 5 percent on woven. Use your factory’s own historical data when you have it, and add more not less for new or difficult fabrics.
Can I use one formula for all garments?
The formulas work well for basic garments like T-shirts, polos, and shirts. For complex styles with many panels, linings, or unusual shapes, the formula becomes unreliable. For those, always work from the CAD marker.
What is the difference between consumption and fabric requirement?
Consumption is per garment (or per dozen); fabric requirement is the total for the order. Requirement = consumption × order quantity + wastage. So 2.2 kg/dozen consumption on a 5,000-dozen order means a requirement of 11,000 kg of fabric plus your wastage percentage.
How do I convert knit consumption from kg to yards or metres?
Use this formula: length in metres = weight (kg) × 1,000 ÷ (fabric width in metres × GSM). Take our T-shirt: 2.21 kg per dozen, 180 GSM fabric at 1.75 m width. That gives 2,210 ÷ (1.75 × 180) = 2,210 ÷ 315 = about 7.0 metres per dozen. Handy when the buyer quotes the order in metres instead of kilograms.
Conclusion
Fabric consumption is one of those skills that quietly separates a junior merchandiser from a senior one. It looks like simple maths, but every number reflects something real on the factory floor a seam allowance, a shrinkage test, a cutter’s waste.
Learn both formulas by heart, and practice until you can work out a T-shirt on a scrap of paper. Then make it a habit to check your formula numbers against the real CAD marker before booking fabric, and keep a record of estimated versus actual consumption for every order. Over time, that record becomes one of the most valuable tools in your merchandising kit.

Mohammad Noor Nabi, known by his author name Noor Ahmed Raaz, is a PhD Fellow at Bangladesh University of Textiles (BUTEX) and the Founder & Editor of Textile Merchandising. He is also an Assistant Professor of the Textile Engineering Department at a renowned university in Dhaka, Bangladesh. His research focuses on textile innovation and sustainability. Awarded the Research & Development Fellowship thrice from the Ministry of Science & Technology in Bangladesh, Noor Ahmed Raaz is dedicated to advancing textile engineering through education, research, and industry collaboration. For inquiries or collaborations, contact Noor Ahmed Raaz via email at textilemerchandising1@gmail.com or WhatsApp at +8801673758271.